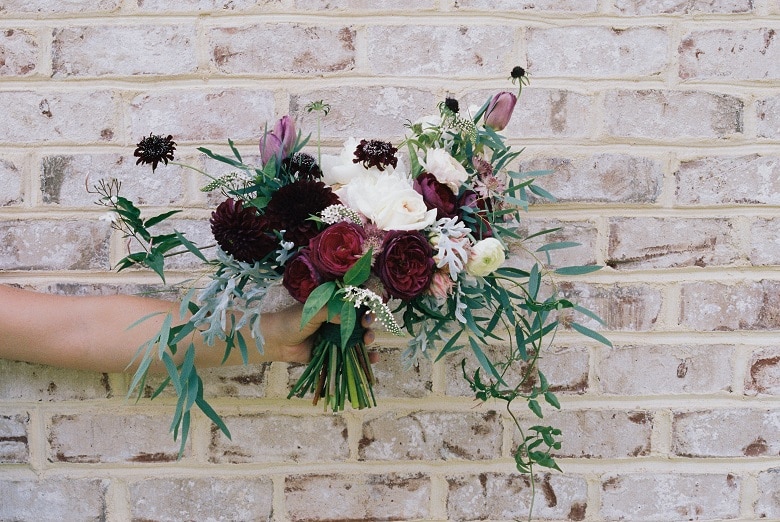
How To Make A Hand tied Wedding Bouquet
A natural hand tied bouquet is very popular.
This type of bouquet is made by holding the flower and foliage stems in one hand and adding the other stems around in a spiral fashion.
The stems are criss crossed at the one point and bound in position with string.
A ribbon bow with long tails completes the bouquet.
One of the advantages is this type of bouquet can be made the day before hand and the flower stems placed in a container of water.
The same type of flowers can be used together such as roses or a variety of different flowers.
If desired, leaves or pieces of foliage such can be placed around the edges.
MATERIALS
Choose suitable materials – you will need flowers with fairly long stems such as roses, irises, carnations, alstroemeria, freesias, Singapore orchids and lisianthus.
Suitable foliage such as camellia leaves, eucalyptus gum, box, ivy, nandina and leather fern.
If using different coloured flowers make sure they are evenly distributed throughout the bouquet.
A mixed bouquet looks best using three to four varieties of flowers plus foliage.
METHOD
Cut the ends of the stems on a slant and give flowers a long drink.
Remove thorns and strip off the lower foliage from the bottom half of the stems.
It is important to remove thorns as they may prick someone or tear a dress. They can be removed with a rose stripper which can be found at florist suppliers or by running a pair of scissors with the blade open along the stem.
Lay the flowers out on the table.
Start off with the largest flower to form the centre and hold the stem between the thumb and first finger on the left hand about 15-20cm (6-8″) from the base of the flower head.
With the right hand add about 4- 6 clusters of foliage evenly around just below the flower heads to help fill in, criss crossing the stems on an angle and turning the bouquet around as you work.
Secure the stems in position by placing the end of a piece of string and winding it around a couple of times. Do not cut the string.
Holding the bouquet in the same way as before with the thumb facing towards you place 5-6 of the same type of flowers evenly around turning the bouquet around clockwise.
Secure all the stems in place with a couple of twists of string in the same place as before. Continue adding flowers in the next round extending these flowers out slightly further.
Check the finished bouquet side on as this is how it will often be seen, specially in the church.
Keep the bouquet a gentle rounded shape across the top like an upside down saucer.
Criss cross all the stems and give the bouquet a quarter turn clockwise after adding a few stems.
Secure stems in position with string in the same place as before when necessary.
Continue adding flowers and foliage stems turning the bouquet around clockwise until the bouquet is the desired size.
Place wired leaves such as camellia or ivy or pieces of foliage such as leather fern around the edges having the tips extend out about 5-7.5cm (2-3″) past the edges of the flowers.
Secure all the stems together with string winding it firmly around several times in the same place as before, cut the string and tuck the end in.
Cut the ends off the flower and foliage stems so they are about 6-8″(15-20cm) long and all the same level. Spray the bouquet lightly with water.
Finish off the bouquet by tying a piece of wide ribbon around the bouquet to cover the string and tie the ribbon in a shoe lace bow with long tails. Cut the ribbon ends on a slant.
Place the stems in a container of water until just before the wedding.
FOR THE BRIDE ON A BUDGET
Instead of centrepieces the bridesmaids’ bouquets can be placed along the front of the bridal table which can look most effective and will cut down on expenses.


